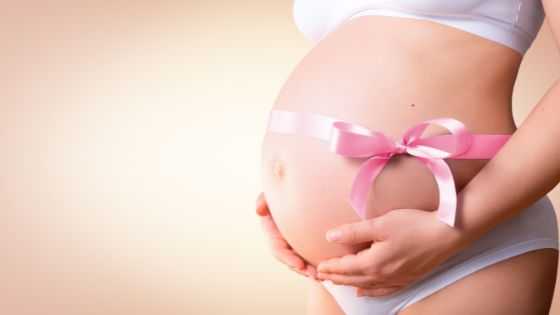
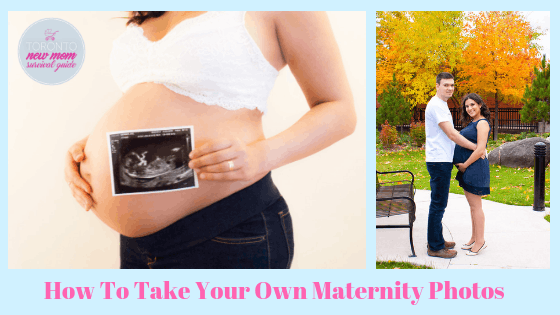
How To Take Your Own Maternity Photos
If you want to take your own maternity photos, but you don’t know where to start, I have you covered!
When I was pregnant with my first baby few years ago, I didn’t have any money to spare. It was my second year in Toronto. My husband was a full-time student, and we were struggling with the high cost of living in Toronto. While it all worked out once my hubby went back to work full time, it was a tight time for our bank account.
I didn’t want to miss out on an opportunity to have beautiful maternity photos. But with a tight budget, it was hard to find a photographer to do the job.
My hubby suggested at the time that we should take our own photos at home. He thought we could have a D.I.Y maternity photo session and this is what we did. The results were fabulous and I would do it all over again.
Benefits to take your own maternity photos
- You can choose as many photos as you want. You are not limited to the number of the images in the package that you chose.
- You are not limited to the time frame of the session that you paid for.
- You are not limited to one location. You can have indoor and outdoor photos.
- You will save money!
My photos in this post
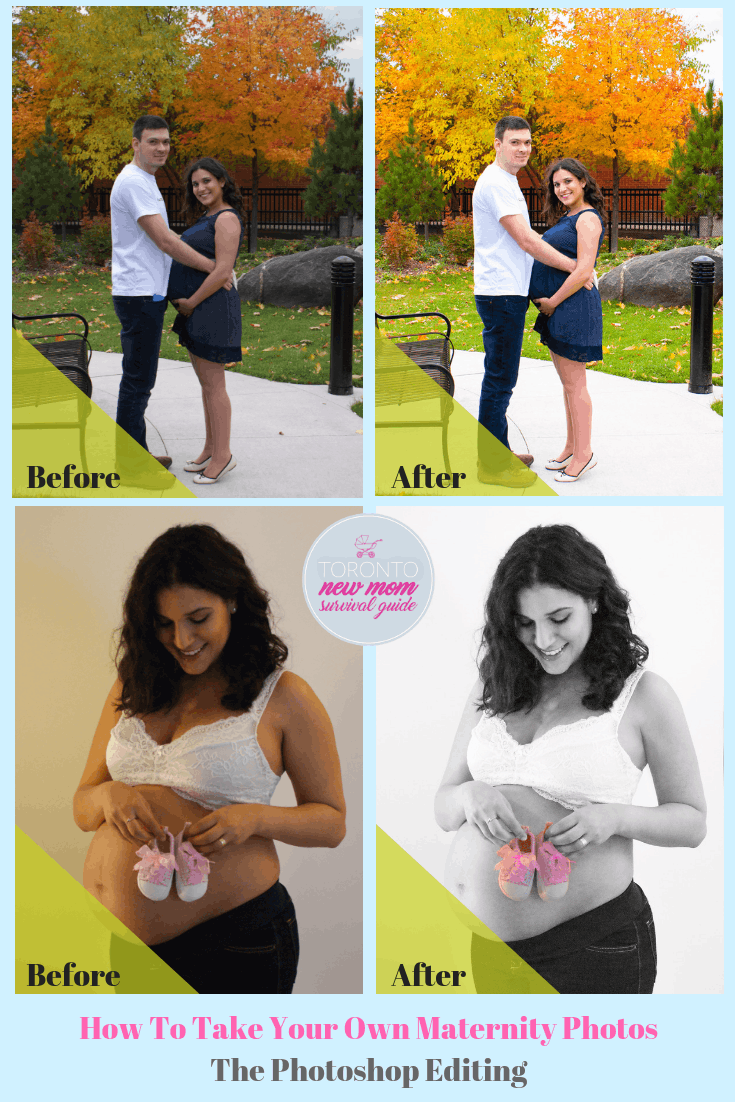
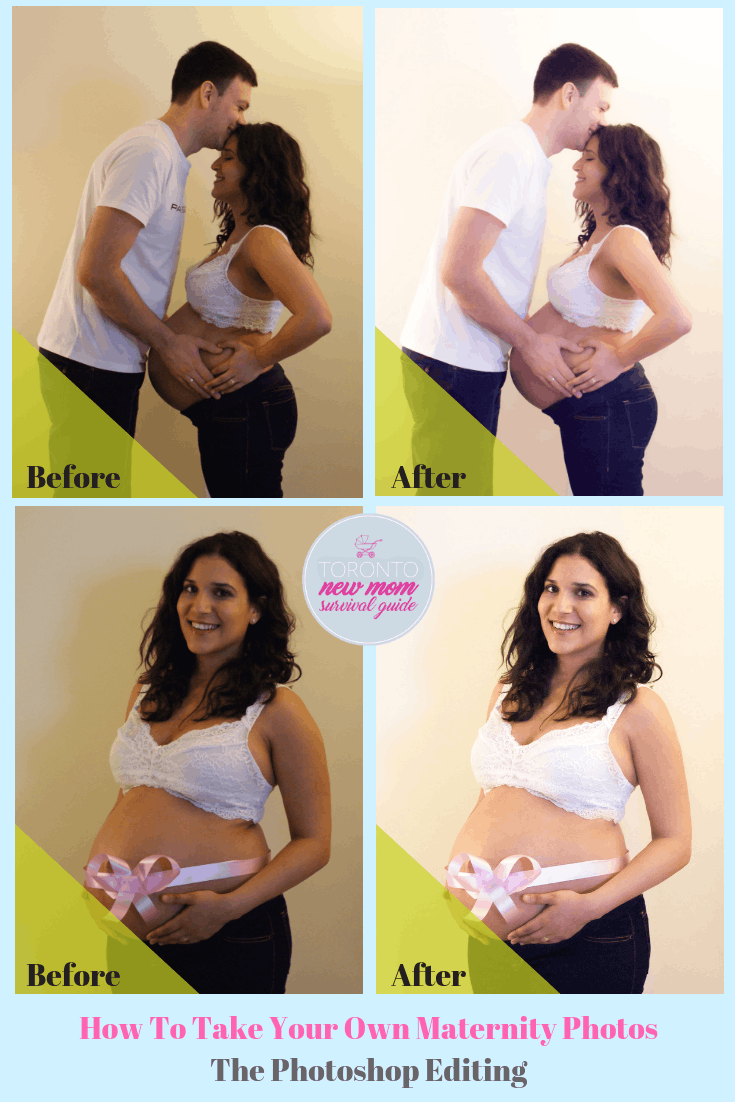
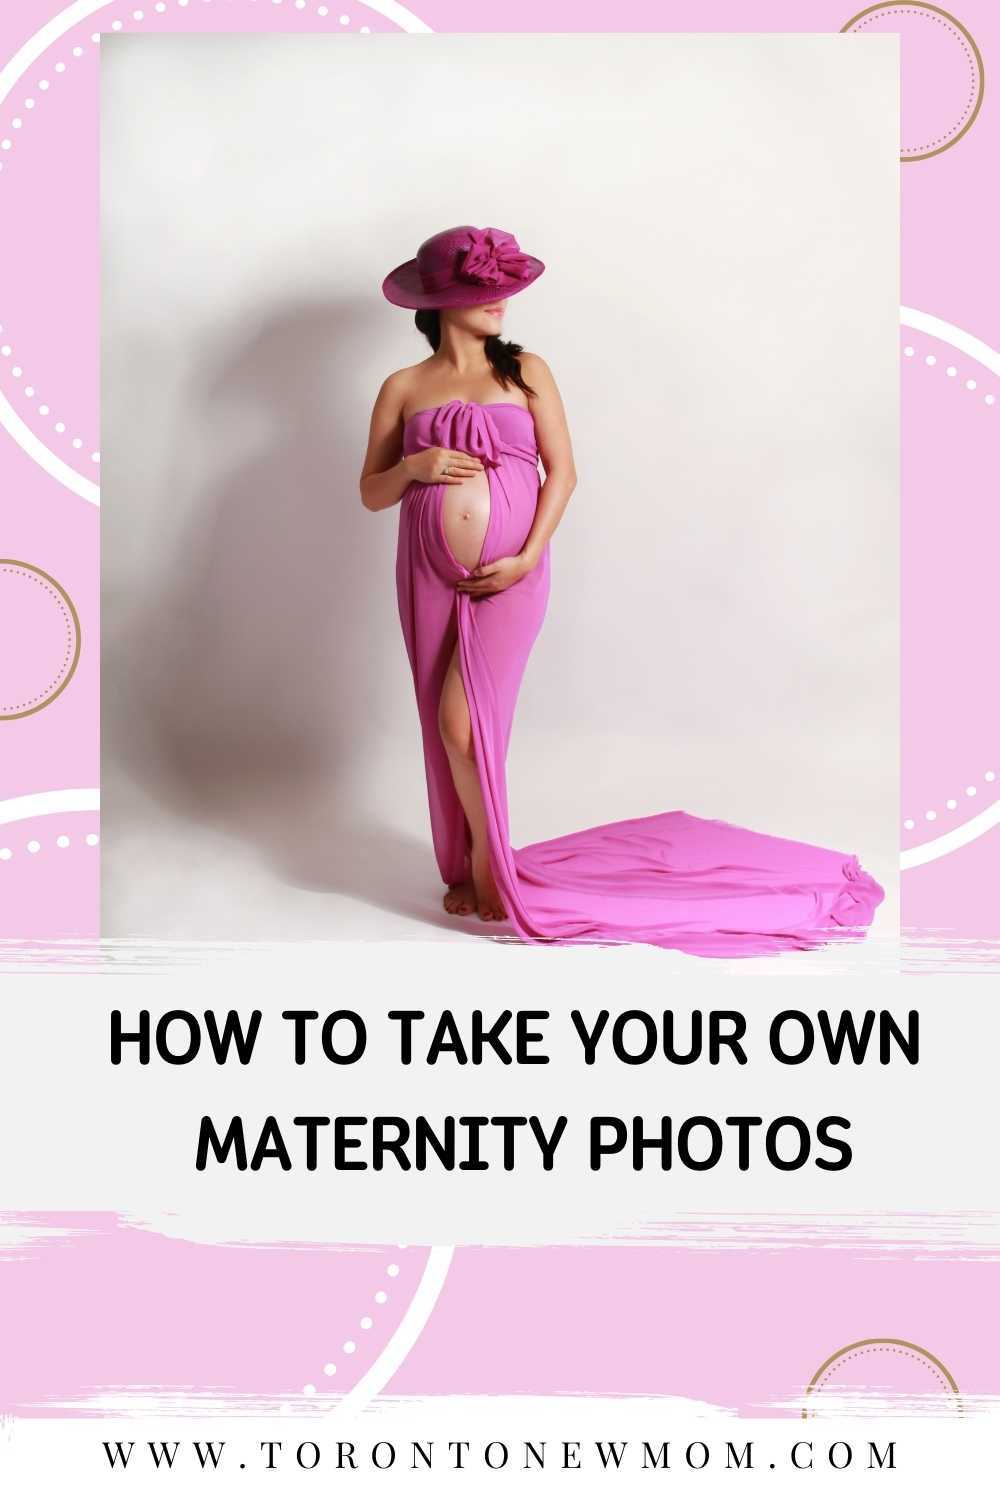
All the images you will see here are photos taken by my hubby or by my friend who came to help us that day. After we had taken all the photos, I sent the 10 pictures that I liked the most to a Photoshop freelancer. I paid around $50.00 CAD to edit all 10 photos and I was thrilled with the results.
Keep in mind that the after-work editing is what makes the photos look so special. One of the reasons why photographers limit the number of photos they provide in a package is the editing that they will need to do with the picture after the session.

How to prepare to take your own maternity photos?
- Camera: You need a good camera for this session. In order for the pictures to be worth it, you want a camera that can provide high-resolution images. Ask your friends and family if you can borrow their camera for one day. You will be surprised by how many people have a good camera at home.
- Browse online for maternity photos. If you’re unsure what to look for, Google images page is where you should start. Choose the photos and the style that you would like to create.
- Prepare all the props you will need for the photos and all the outfits you would like to wear beforehand.
- The best time to take the photos will be around noon when you can maximize the neutral light in your house.
- For “Studio Like” images, choose a bright, clean wall in your house. Clear all the furniture out of your way. Bring as many floor lamp as you can and direct them to the wall. Sit or stand in front of all the lights. If you have some shadows from all the lights in your images, you can ask the editor to remove it later.
- It is better to take the photos outside with natural light.
- Make your hair and make-up. It is time to get pampered. If you want to use a professional for this, that’s up to you.
- Choose the best photos and send them to a Photoshop freelancer. You can find one at www.freelancer.com , www.fiverr.com or www.airtasker.com. A good Photoshop freelancer can do miracles for your picture.
Here are some of my maternity photos that I took alone. I’m showing you the before/after photos. You can see by yourself the difference that the Photoshop editing makes.
If you have any comments or questions, feel free to add it in the section below.
- Canada Day Events in Toronto - June 25, 2026
- AI for Moms: A Beginner’s Guide to Saving Time, Reducing Stress, and Managing Family Life - June 3, 2026
- Getting Ready For Kindergarten - May 20, 2026

Facebook Comments