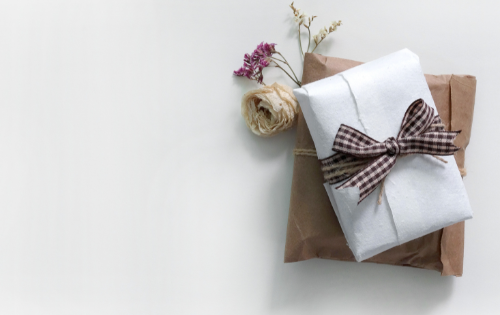
Easy DIY Christmas Gifts That Look Hard
How to make easy DIY gifts to impress for Christmas, that look hard.
Oh Shit, it’s almost Christmas. Don’t worry, I’m right there with you.
Christmas can be stressful, but making DIY gifts doesn’t have to be; You can easily make thoughtful, budget-friendly, impressive gifts that look quite hard. I don’t know about you, but I love making homemade DIY gifts. I love to craft, it’s thoughtful, and I love to impress people with easy things that look hard. Sometimes though, they actually ARE hard, and you end up spending a lot more time, money and stress than ever feels worth it. This is where I come in. I’ve spent a good amount of time making these easy DIY Christmas gifts over the years, and I’ve compiled a few of my favourites for you to use for this holiday season. Trust me, they look hard, but they’re easy and impressive.
Easy DIY Christmas Gifts That Only Look Hard
Easy DIY Christmas Gifts: DIY Food/Treats
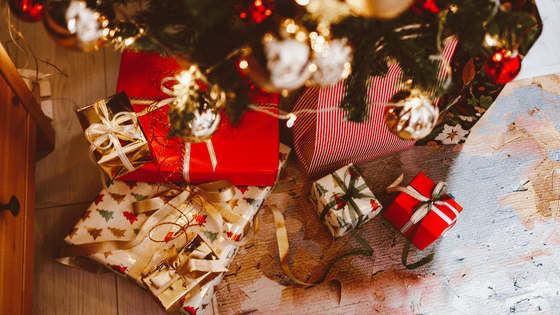
Christmas is all about goodies. Cookies and cakes and candies and treats and literally anything else that feels sweet, and looks festive. Good quality goodies can be quite pricey, and many end up in an ever-accumulating pile before being given away or trashed because they’re now stale. Many homemade goodies on the other hand, can also turn out to be quite pricey, and take up a whole lot of time and you don’t even know if they’ll taste good.
Don’t worry, I’ve got you.
Festive Chocolate Covered Pretzels
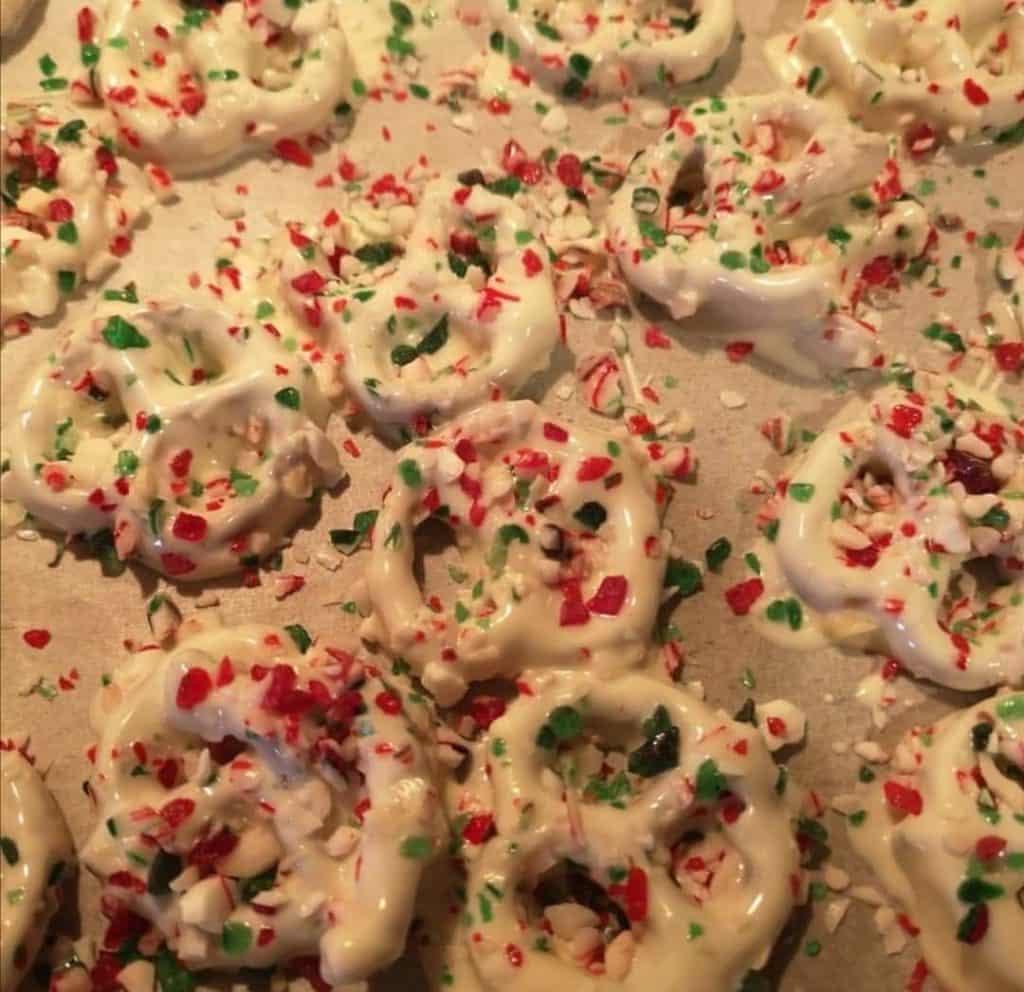
I made these last year, and these were probably the easiest DIY Christmas gifts I could have done. And the bonus? They look great, taste great, and they look harder than they are. No pinterest board needed. No real recipe to check and recheck. 4 ingredients that took five minutes to procure. They were easy to transport, and easy to customize in any way you see fit. They’re an easy thing to bring to a household you’re invited to for a Christmas Party. And let’s face it, they look festive AF.
Ingredients
- Pretzels. I’m gluten-free, and using gluten-free pretzels are a great way to be allergen free, if needed. Regular pretzels are obviously much cheaper.
- Chocolate melting wafers. As tempted as you may be to use chocolate chips, I promise you the ease of the melting wafers is a game changer. I bought both dark and white wafers last year, and have more than enough for this year. Just make sure if you’re looking for chocolate, don’t buy candy melts. They all look the same. You can buy these super easily on Amazon. I’m a big fan of YuPik, I’ve used this brand for many of my bulk items and am always pleased.
- Crushed candy cane pieces. You can buy these in bulk at your bulk food store, because you don’t need that many. You can also buy these on Amazon, but who needs 1kg of candy cane pieces? Maybe you do, I don’t know.
- Cute holiday tin. Pretzels are great because they don’t make a mess. Throw those suckers in a cute tin from the dollar store, and bam! Fancy packaging.
Directions
- Melt your Chosen Chocolate Wafers.
If you have a double boiler, use this. If not, grab yourself a small pot and a stainless steel bowl to sit nicely nestled in (not fully in) the pot.
With your wafers in the bowl, add some water to the pot and put the bowl on top, ensuring the bottom of the bowl does not touch the water.
Slowly bring the water to a boil over medium heat, stirring the wafers constantly until melted. - Dip Your Pretzels.
Take a plastic fork (or honestly, whatever works for you. I think I read a suggestion somewhere about cutting two prongs off a plastic fork, but it did nothing for me. You’ve got lots of room for error here, so don’t fret) and dip your pretzels into your freshly melted chocolate. - Place your Pretzels.
As each pretzel gets dipped, place them neatly onto parchment or wax paper in a single layer on a cookie sheet. - Sprinkle Those Candy Canes.
While the chocolate is still warm and melty, sprinkle your candy cane pieces onto your pretzels. - Freeze.
Pop that tray of festive goodies in the freezer until the chocolate hardens. - Final Presentation!
Once they’ve hardened, throw them into your festive tin (if you’re really feeling it, add some festive cellophane as a liner) and pop them back into the freezer until you’re ready to gift.
Customizations
There’s a few things you can do to customize these bad boys. Like I mentioned, I chose white and dark chocolate wafers. I loved the contrast, and let’s face it, white chocolate and candy cane is adorable. You don’t have to do one, and then the other. You can drizzle one on TOP of the other. I know, wild.
OR, if you don’t want too much sweetness, only drizzle, and don’t dip them at all.
Don’t like peppermint? Melt some peanut butter and drizzle that on your chocolate. (Spoiler: these are AMAZING, but slightly messier because the peanut butter doesn’t harden as much. Still worth it)
Want EXTRA sweetness? throw come Skor bits on the chocolate. These don’t have to be only for the holidays, they’ll make a great gift anywhere, any time.
Happy Pretzel-ing!
Holiday Hot Chocolate Mason Jars
This is literally exactly what the title says. Hit up your nearest bulk food store, and load up on hot chocolate mix, marshmallows, and whatever other tiny little treats you would want in your Christmas hot chocolate.
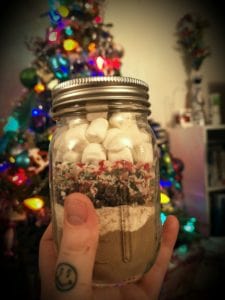
I’ve seen variations of this all over Pinterest. Some complicated, some even more complicated. I went the simple route, and didn’t measure a goddamn thing. You’re sure to impress your loved ones with this super easy Christmas DIY gift that looks way harder than it is.
Ingredients
- Mason Jars. The standard size will do. I think it’s 500ml.
- Wide Mouth Canning Funnel. Trying to put the ingredients into your jar without this… just don’t do it. You’ll thank me later.
- Tart Tamper. This is to pat down your powdered ingredients so they’re not a hot mess. Also worth it.
- Hot Chocolate Mix. I had a few people to gift to, so I chose a variety of flavours, simply because Bulk Barn gave me that option.
I also chose some white hot chocolate, stritcly for the aesthetics of my mason jar layers. - Mini Marshmallows.
- Tiny Treats/Extras. This is to make your hot chocolate tastier, and your mason jar prettier.
I chose a variety of crushed candy cane, Skor bits, and mini chocolate chips.
Directions
- Organize your Ingredients into like categories. (You’re probably not going to add candy cane pieces with skor bits. But maybe you are. That’s your choice)
- Starting with your main hot chocolate powder, layer your ingredients. Make sure to use your tamper to push them down as much as possible. The main powder should probably be about 1/3-1/2 of your jar. Layer the goodies however you’d like, and finish off your jar with the marshmallows at the top.
- That’s literally it. Close your jar, add a ribbon if you like, and a label saying what kind of hot chocolate it is.
I chose not to include exact amounts, because when I made them, I was tired and it felt like a lot of work. As I gifted them, I recommended that they dump all ingredients into a bowl, mix it all together, and add whatever amounts they would like to hot water or milk, depending on their desired sweetness. Then they can toss it all back into their jar until it’s finished. Worked beautifully.
Easy DIY Christmas Gifts: Holiday Decor
What’s a more festive gift than an easy DIY Christmas decoration that looks like it was hard to do? (Full disclosure, I did not invent this. For the original post, visit https://pin.it/3a3narglhvgjwb
Christmas Car In a Mason Jar
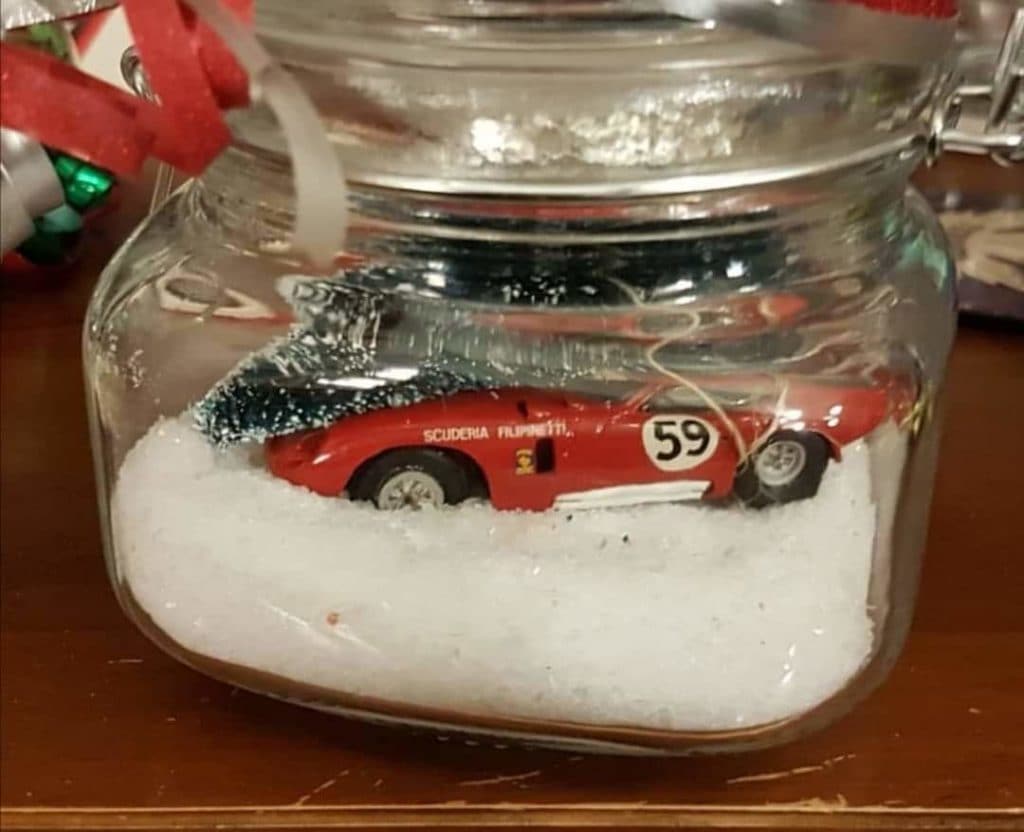
My goodness, I love how this rhymes.
This Christmas gift was so cute, so incredibly easy (took less than 15minutes to DIY) and my Dad was so impressed he never stopped talking about it and had no idea how I made it.
Supplies
- Short, wide mason jar. The only thing that matters regarding the size you choose, is that your chosen car fits inside of it.
- Car of your choice. Obviously, a red one feels festive, and a truck is super cute because it’s carrying a tree, but you can choose whichever toy car you’d like. My Dad is a car enthusiast, so I got my Mom to stealthily capture a red favourite of his from his collection.
- Tiny tree. Just be aware of the size in terms of your car and jar, but these can be found at the dollar store or Michaels. I think their initial purpose is for tiny Christmas villages?
- Epsom Salts. This is your fake snow.
- Twine. Or literally any kind of string, to tie your tree onto your car.
- Ribbon. To tie around the lid of your jar, for extra festive-ness.
Directions
- Using your twine, tie the tree onto your car/truck. A drop of hot glue makes everything easier and more stable. The car I chose was a collectible, so I knew I had to keep the integrity in tact, which meant no glue.
- Add your epsom salts into your mason jar. Plop your car in there and see how it looks. Adjust the amount however needed.
- If your car is sinking, or flopping around all over the place, glue it. To prop it up higher, I would suggest gluing it to some white pom poms (or honestly anything you have that creates the right height for you) and then gluing those pompoms to the bottom of the jar. Just make sure the “snow” covers them.
That’s it. Close your jar, tie a ribbon around the top. And now you have a DIY Christmas Car in a Jar.
So easy. Looks Hard, right?
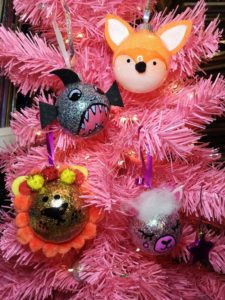
Ornaments
This was my go-to last year, for literally everyone. Once I got into the hang of it, I just popped these out like you wouldn’t believe, and thety look SO GREAT. The best part of these are they’re so customizable, whether you’re crafty or not.
Supplies
- DIY ornaments. You can get these glass or plastic. I prefer plastic, because, well… babies. But that’s up to you. Last year I bought a giant tub of them at Michael’s, but I also noticed you can get packs of three at the dollar store this year.
- Funnel
- Crafty Things! I know, how vague. But hear me out, because this is where you can choose whatever you want to do. You can choose calligraphy with oil based paint-markers, glitter bulbs, pom-poms, novelty characters… just about anything. I’ll go over a few options below.
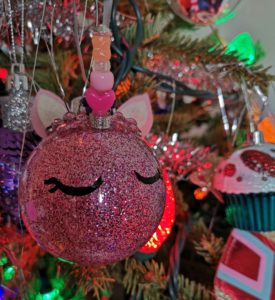
Glitter Bulbs
- Ornaments
- Any loose glitter(s) of your choice (dollarstore is cheapest)
- Aleene’s DIY Glitter Ornament Glue (I don’t think I could have come up with a more descriptive item name)
- Oil-based Sharpies (This is optional, if you’d like to write and/or draw on your ornaments)
- Ribbon (for decorating the cap)
Directions
- Draw/Write on your ornament using Sharpies. I recommend doing this before filling your bulb, in case you make an error and need to use another bulb.
- Squirt a good amount of glue into your bulb, and swirl around, coating all of it. Pour out excess.
- Using the funnel, pour in whatever glitter colour or combination of colours. Cover the hole of the bulb, and shake around making sure it coats. If you’re making a colour combo of glitter, make sure you mix them prior to putting them into the ornament to ensure they’re mixed properly.
- Once you’ve popped the cap back on, add a ribbon around it for hanging, and I liked to tie an additional curled one around the cap itself just for something extra.
Customizations
- Stuff the ornament with coloured mini pompoms, or crinkle-cut paper grass, or literally whatever you want. You can even dye epsom salts with food colouring for a festive bath treat.
- Add ears/googly eyes etc using a gluegun and felt or foam sheets (or even bristol board) to make characters.
- Attach literally whatever you want. Jewels, buttons, feathers… using a gluegun.
Voila! You now have gorgeous, customized DIY Christmas ornaments to gift that people will use every single year. They don’t create clutter, they’re cute, they were so easy, and yet they look so hard and impressive. Well done, you.
- Celebrate Mother’s Day 2026 In Toronto - April 22, 2026
- Best Summer Recipe: Cold Fruits Smoothies Bowl - April 15, 2026
- Things to Do in West Palm Beach with Kids - February 8, 2026

Facebook Comments